This post is sponsored by Rust-Oleum and contains affiliate links, but all opinions are 100% mine. Thanks for supporting the brands that support Love & Renovations!
It seems a little ridiculous to actually admit this out loud, but I’m a home decor and DIY blogger who, up until this week, had never used either chalk paint or milk paint.
What am I even doing with my life?
I’ll admit – both chalk paint and milk paint have previously seemed to not really be my style. I feel like you most often see these kinds of paint used in more farmhouse-style homes, or on rustic, chipped furniture. Neither of those are styles I tend to gravitate to, so it has seemed pointless to try it out. But, I dipped my toe in the chalk paint water late last year when I used some chalked spray paint to make some fall decor for our mantel, and I was truly surprised by how much I loved the velvety finish.
So, when my friends at Rust-Oleum asked if I’d be interested in giving their milk paint finish a try for a project around the house, I knew I had to say yes – it was high time I stepped out of my comfort zone a bit and saw what all the fuss was about. And, y’all, I’m so glad I did.
I’ll give you a little peek before I keep talking…
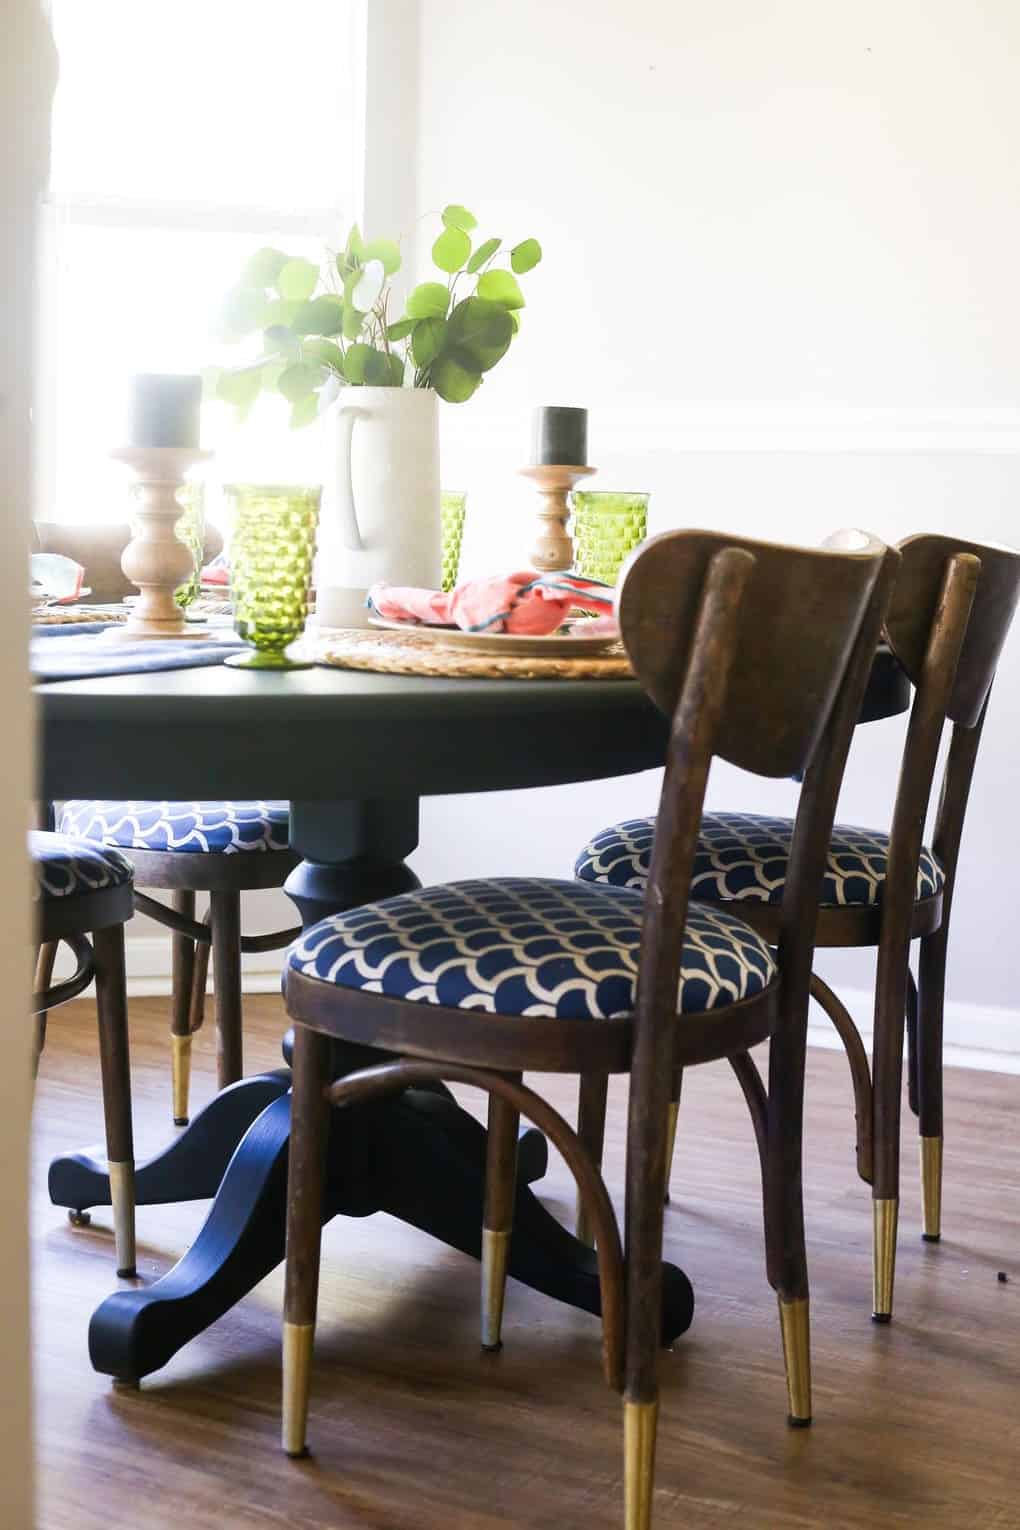
Gorgeous, right?!
I promise I’ll get into all of the details of why we chose this table and what we think about the paint, but first I want to dive a little deeper into milk paint in general because, I have to admit, before doing this project I didn’t really know anything about it. So, here are the three questions I asked myself before I got started, along with what I’ve learned with a bit of research.
What is milk paint?
Before I can talk about how milk paint functions and how to use it, I feel like we need to talk about what it even is. Milk paint is a water-based paint that is generally made with milk and lime, with pigments mixed in for color. You’ll often find milk paint in powdered form, and you have to add water to activate the paint. Rust-Oleum, however, has (thankfully) done all of the work for you and their Milk Paint Finish comes in a liquid form – you can just open the can and get to painting!
Why would I use milk paint?
This was my big question – why would I choose to use milk paint over regular old paint…especially when milk paint seems to be tailored to a style that just doesn’t describe me. I learned through this process that I was definitely wrong about the style of milk paint (it’s all in how you use it and what you use it on!), and there are a few benefits to milk paint that will definitely have me reaching for it again.
- The prep work is minimal. Rust-Oleum’s Milk Paint Finish is formulated to have higher adhesion power than regular old paint, which means you don’t have to do nearly as much work on the front end to make sure you get a good finish. In fact, if you’re looking for that chippy, rustic look on your piece, you can generally just whip out a paintbrush and get to work without sanding. I wanted a more polished finish, so I gave our table a quick sanding to scuff up the finish on it a bit, but you don’t have to remove every last bit of the finish – you just need to give it a bit of grit for the paint to latch onto. Overall, I’d say the prep work for this table took me no more than 10 minutes or so, which would have been doubled (or even tripled) if I was using regular paint and needed a totally clean surface. And if I was going to stain (which was my original plan), it would have taken even more time to remove the original finish. I think we can all agree that milk paint is a winner for those of us who like to be lazy with our prep work.
- The finish is very durable. Contrary to what I originally believed, milk paint doesn’t always chip over time. The finish on Rust-Oleum’s Milk Paint Finish is extremely durable and should be able to withstand a lot of wear and tear. Some formulas of milk paint may chip over time, but this stuff is specifically formulated to withstand more than the average paint!
- You don’t need to worry about brush strokes. Can I get a hallelujah?! One of the biggest pains when it comes to painting is having to break out the foam roller, spend a ton of time watching for brush strokes, and dealing with the annoying clean up that rollers bring with them. That’s why I usually reach for my paint sprayer instead. But with milk paint, you’re actually supposed to just use a brush, and you’re really supposed to embrace the brush strokes. The hand-painted look is half the charm of this stuff, and the lightly textured look is so charming and really adds to the character of the piece. I loved how easy it was to only have to use one tool (my brush) – it made the process a lot faster, and the clean-up was a breeze!
What’s the difference between Rust-Oleum’s Chalked Paint and Milk Paint Finish?
Please allow me to confess that for a very long time I had no clue that these two types of paint weren’t the same thing. In reality, chalk paint and milk paint are actually very different and provide very different results. Here are a few key differences between Rust-Oleum’s Chalked Paint and Milked Paint Finish:
- Chalk paint provides a velvety, smooth finish, while milk paint’s finish is lightly textured with some brush strokes.
- Chalk paint has a more opaque coverage (you can generally achieve full coverage with just one coat), while milk paint provides a bit more control over the opacity of the coverage – I had to apply three coats before my table was fully covered. This means that milk paint gives you a little bit more flexibility on the finished product and just how much you want to cover up the previous finish.
- Chalk paint tends to hide any wood grain or imperfections in your piece, while milk paint can highlight it. You really can’t see this with my finished piece because I opted for extra coverage, but as I was working on the first two coats, it was interesting to see how the wood grain still showed through the paint’s finish. Milk paint provides a lot of flexibility with allowing the beauty of your wood piece to still shine – which you can’t really achieve with any other kind of paint. Because of this, chalk paint is also less likely to be affected by the underlying color of your piece than milk paint will. For example, if you use white milk paint on a dark piece of wood furniture, the color of the finished result will look different than if you were to use white chalk paint – because the wood underneath can affect how the paint shows up.
I hope that helps explain milk paint and how it works a bit – if you’re anything like me, you knew none of this, and I always find it really helpful to learn about new types of paint! For me, I can definitely see this paint being really useful when I want a less polished-feeling piece, or when I’m looking for a matte finish on something. I’m also dying to play around with adding fewer coats to see how the wood grain can really shine, so be on the lookout for that sometime too!
But, enough technical details. Let’s chat about our table.
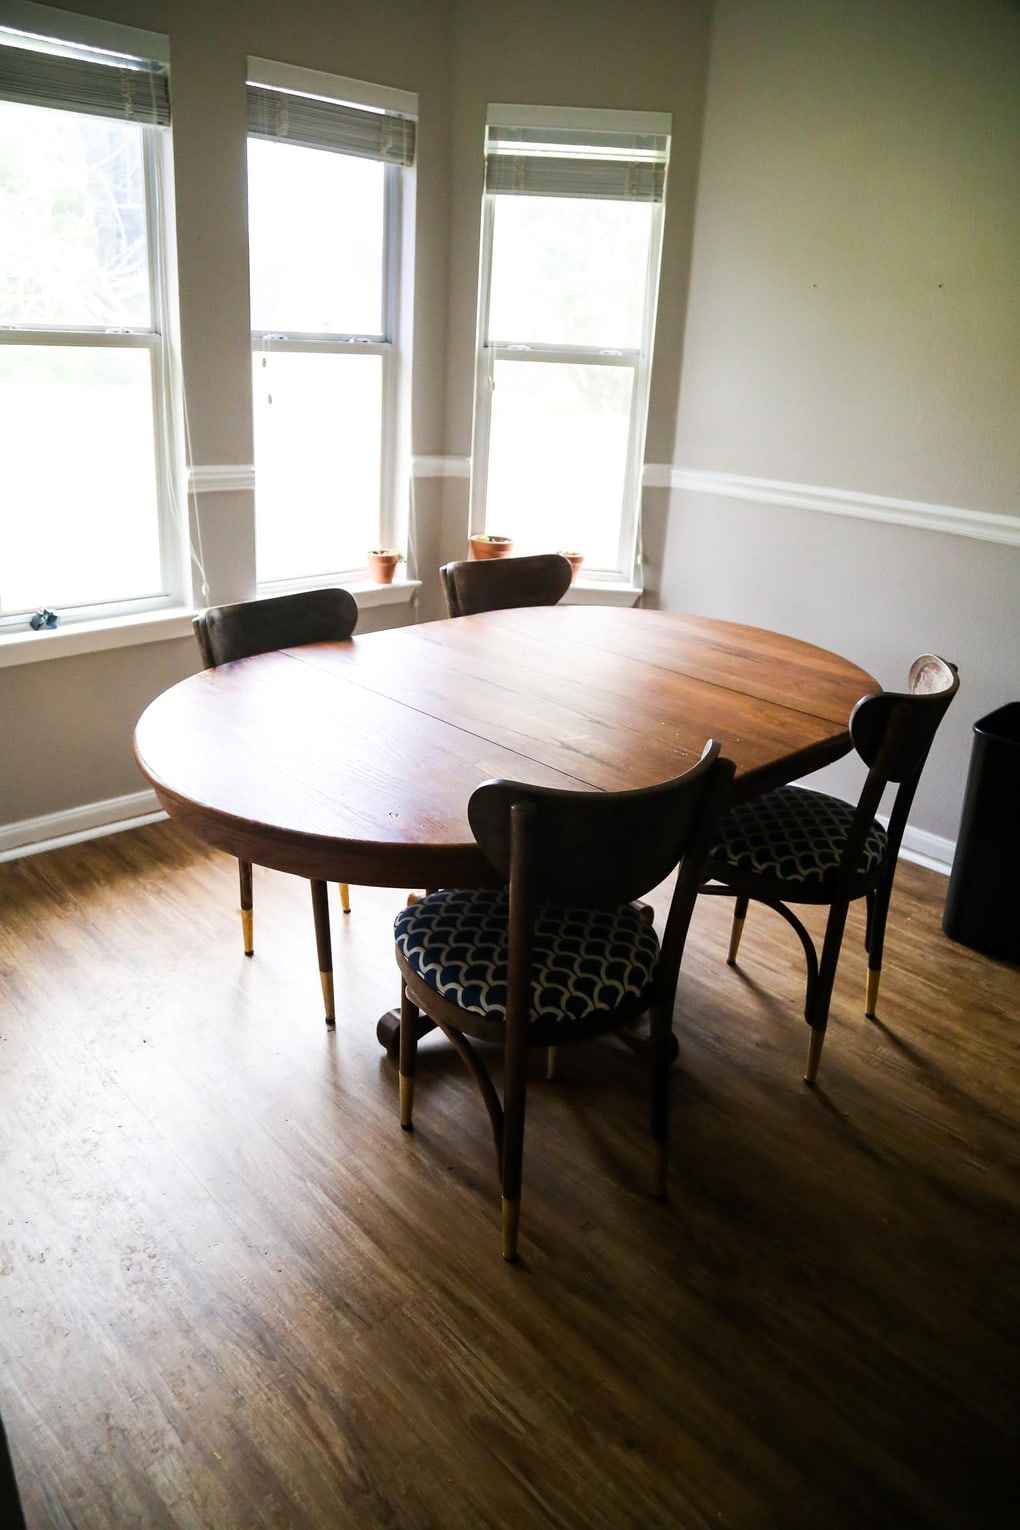
This is what our table looked like before. We snagged this table for about $100 on Craigslist shortly after we moved into this house – we needed something large enough to fill this space, but cheap enough that we wouldn’t kick ourselves if we changed our minds down the road. We will likely be building our own custom table for this area (because we have big plans for this little nook and it’s hard to find a table that’s just right for what we want to do), but this table has served us well over the last few months.
Except for the part where it’s kind of ugly.
I mean, the shape of the table really is perfectly fine. We like the pedestal base, and the oval shape works well in this space. But the orange-y finish and cheap-looking wood? Not cute.

I’ve said all along that my plan was to stain this table, but the more we talked about it the more we realized that might not be the best plan. In order to get a good stain finish, you really need to be working with raw wood, and we weren’t even sure if all of this table is actually real wood. In addition to that, sanding the base of the table to completely remove the old finish was going to be a nightmare, and it all just seemed like a lot of work for a table that we don’t even plan to keep in here long term.
So, paint is the obvious next choice.
We went with black for the table for a few reasons – first of all, it’s a fun, unexpected choice that just makes me happy. I’ve said many times that in this home I’ve really been gravitating to darker, moodier colors, and this fits right in that mindset. We also have plans for this room (that may or may not include tackling it in the One Room Challenge next month) that involve a lot of white, so we needed some contrast. I felt that any bright color would be too limiting when it comes to planning other things in the space, so black was the logical choice.
And, really, I’m so pleased with how it turned out.

As I said before, the process for painting this table was so simple with Rust-Oleum’s milk paint finish. First, I sanded the table lightly using our power sander. I just did enough to scuff up the surface and remove any sheen from the old finish on the table. Then, I grabbed my favorite paintbrush, a can of Eclipse Milk Paint Finish from Rust-Oleum, and got to work. I’d estimate that it took me about 15 minutes to get each coat of paint on the table (remember that you don’t have to stress about brush strokes, so there’s a lot of room for imperfections here!), and you only have to wait 30 minutes before applying the next coat.

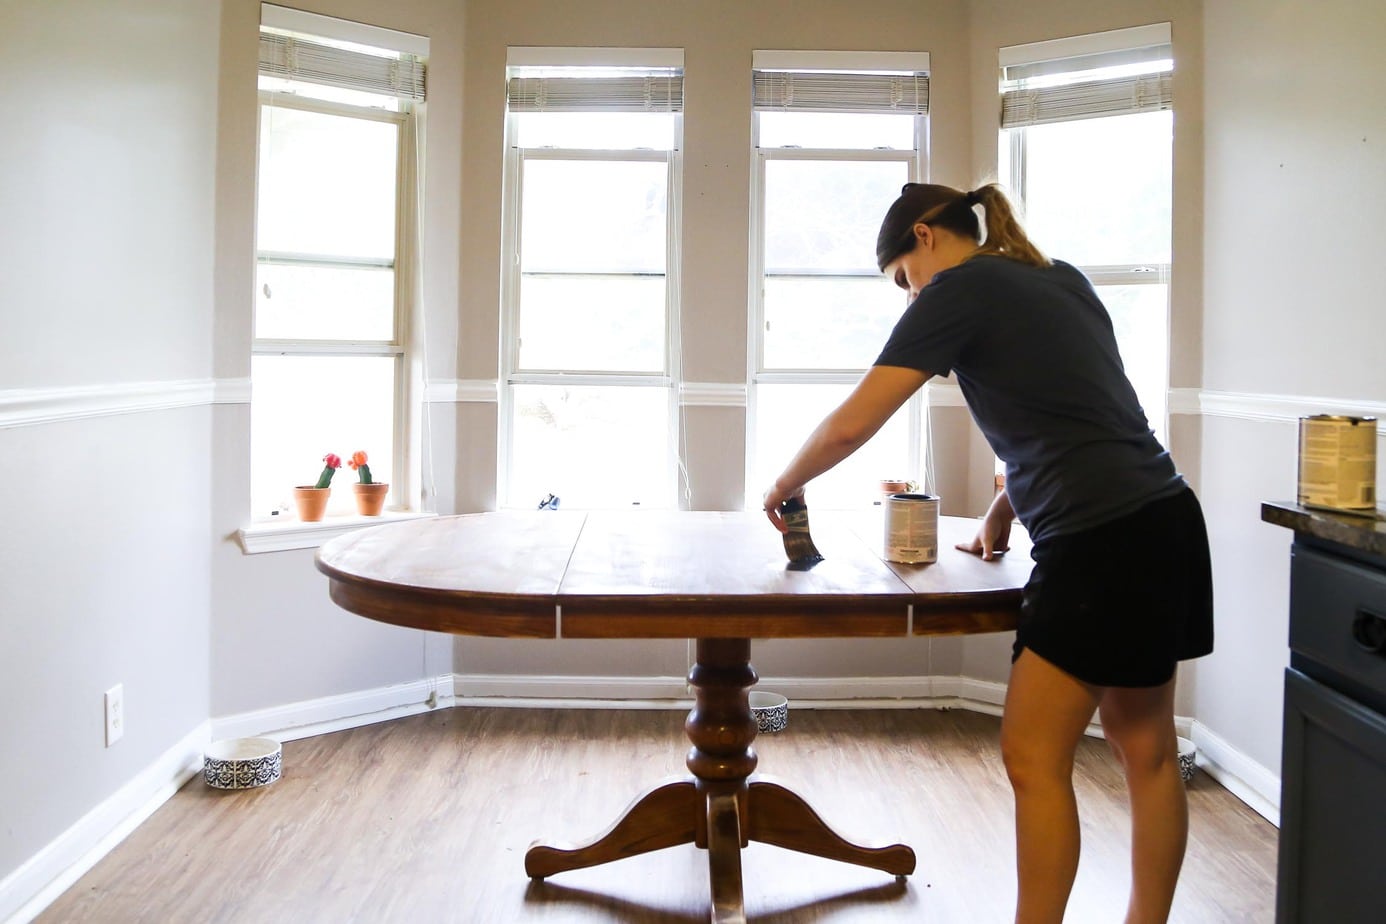
I got started on the table after dropping Jack at school at 9:00 one morning, and I was finished, showered, and settled in on the couch to get some work done by lunchtime.
Here’s a quick peek at how the finish evolved over the three coats – it’s kind of hard to see because of the harsh lighting in this spot, but you can definitely see the opacity of the paint increasing and the intensity of the brush strokes decreasing!


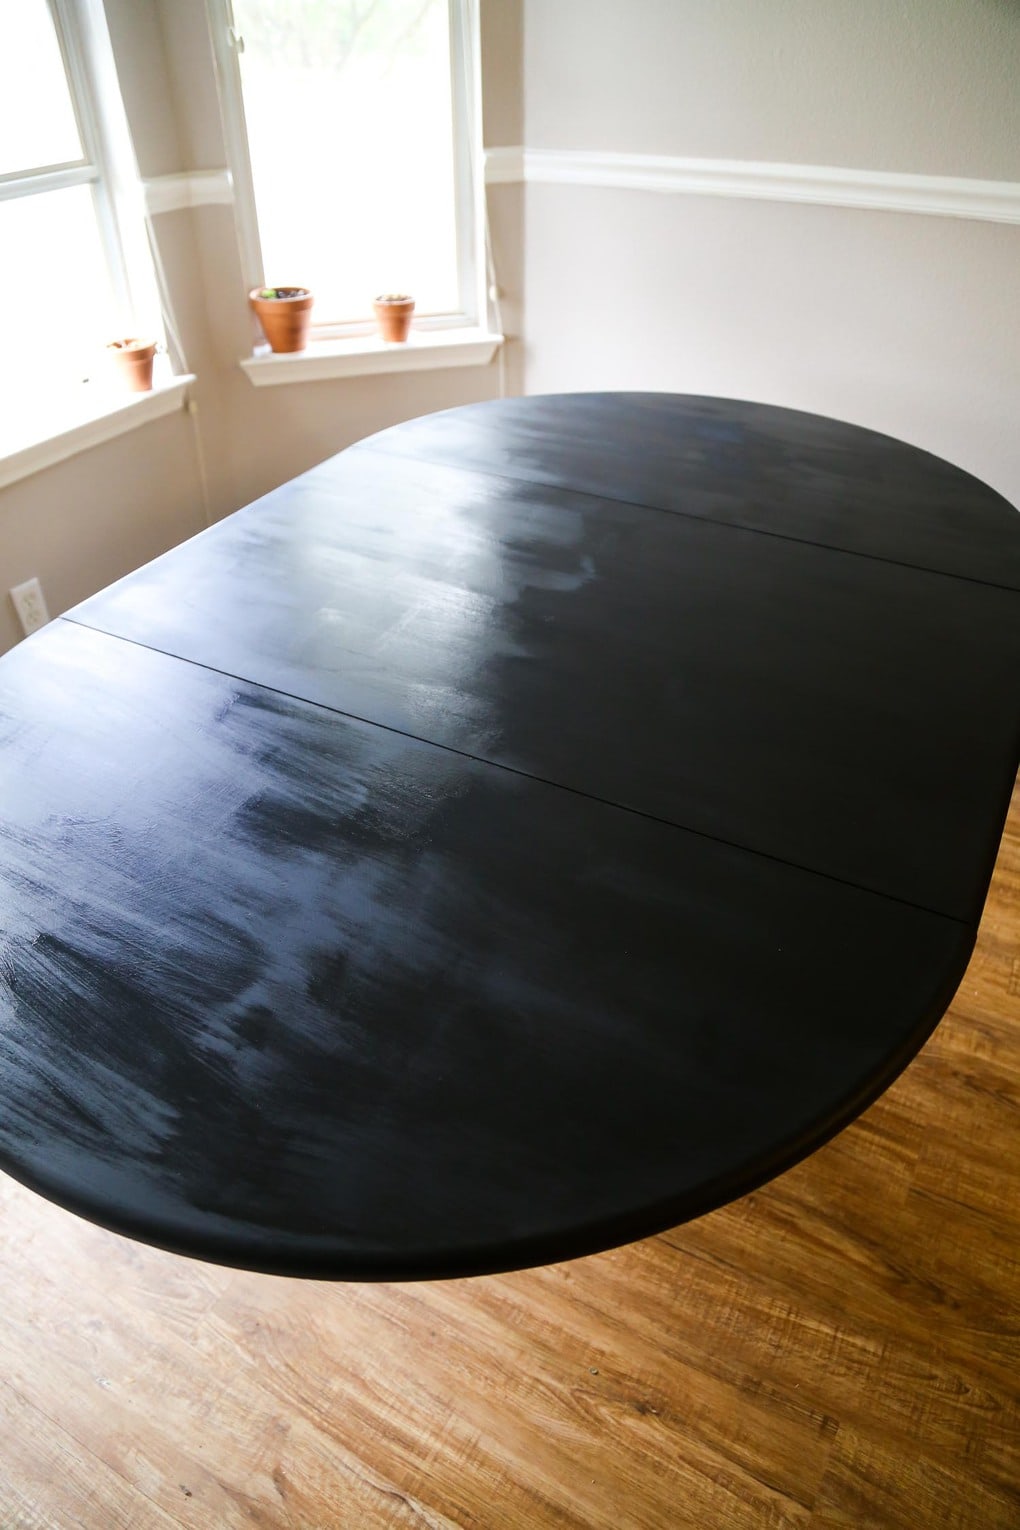
After I was done with the milk paint, I gave the paint a full 8 hours to dry. Because we were using this paint on a dining room table, we needed a protective top coat – typically speaking, you can skip a top coat with milk paint (or just apply something light like a wax). We used Rust-Oleum’s Chalked Protective Topcoat in the Matte finish, and I love how it made the table feel slightly more “finished” without adding any extra sheen. You can’t tell much of a difference visually after adding the top coat, but the paint feels slightly less rough to the touch.


After Corey got home from work and saw the table for the first time, he couldn’t stop randomly commenting on how much he loves it. We both agree that it makes us like the table a lot more, and it just feels so much more polished and pretty in this little nook. Of course, we also both agree that the chairs don’t really work in here anymore, but we’ve been saying that ever since we moved in. As much as we love these chairs, they’re very lightweight and Jackson tips them over at least once a week during dinner. They were great in our old breakfast nook when they were being used sparingly, but they just don’t function super well as an everyday chair for us. So, we’ll be replacing those soon with something a little larger and more comfortable, and then I think this nook will look even better!

I can officially say that I’m a milk paint convert, and I’m already brainstorming other places that I can use this paint. If you’re curious, be sure to check out Rust-Oleum’s line of milk paint finish (they have some fabulous colors!) and give it a shot yourself – if you’ve been wanting to paint some furniture but are a little nervous about actually diving in and trying it, milk paint is a great way to get your feet wet and give it a shot!
Love this post? Be sure to pin it! You can also follow along with us on Facebook, Instagram, and Pinterest!
Psst: Make sure you never miss out on an update, post, or project! Sign up for the newsletter below to make sure you’re always in the loop.
The post Milk Paint Dining Table Makeover appeared first on Love & Renovations.